 |
am3zzw00004325
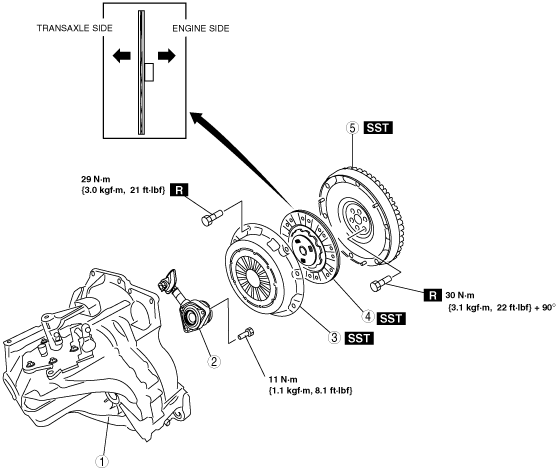
CLUTCH UNIT REMOVAL/INSTALLATION [J65M-R]
id0510008003a2
1. Remove in the order indicated in the table.
2. Install in the reverse order of removal.
am3zzw00004325
|
|
1
|
Manual transaxle
|
|
2
|
Clutch release cylinder component
|
|
3
|
Clutch cover
|
|
4
|
Clutch disc
|
|
5
|
Flywheel
(See Flywheel Removal Note.)
(See Flywheel Installation Note.)
|
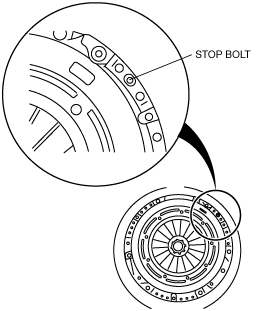
Clutch Cover and Disc Removal Note
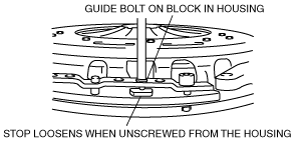
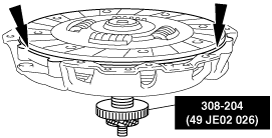
1. Unscrew the stop to loosen.
am3zzw00004326
|
2. Install the SST.
am3zzw00004327
|
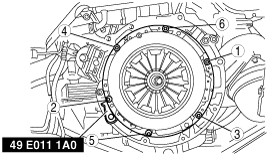
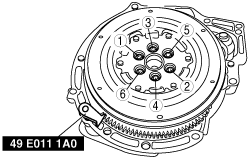
3. Loosen the clutch cover installation bolts opposite each other in increments (approx. 5 passes).
am3zzw00004328
|
4. Remove the clutch cover and disc.
Flywheel Removal Note
1. Hold the flywheel using the SST.
2. Remove the bolts evenly and gradually in a crisscross pattern.
3. Remove the flywheel.
am3zzw00004329
|
4. Inspect for oil leakage from the crankshaft rear oil seal.
Flywheel Installation Note
1. Clean the crankshaft thread holes before installing the new flywheel installation bolts.
2. Install the flywheel to the crankshaft.
3. Hand‐tighten the new flywheel installation bolts.
4. Install the SST to the flywheel.
am3zzw00004330
|
5. Gradually tighten the flywheel installation bolts in a crisscross pattern.
Clutch Cover and Disc Installation Note
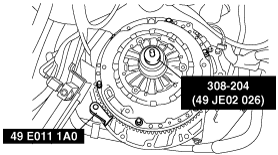
1. Using the SST, center the clutch disc on the clutch cover.
am3zzw00004331
|
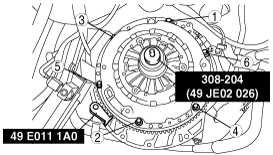
2. Using the SST, install the clutch disc and clutch cover.
am3zzw00004332
|
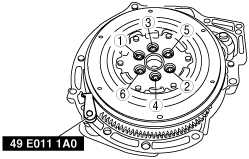
3. Tighten the new clutch cover installation bolts finger tight and then by two turns at a time in the sequence shown to the specified torque.
am3zzw00004333
|
4. Remove the SSTs.